Spotlight Search UI written in SwiftUI and Combine.
SpotlightSearch aims to provide macOS spotlight search UI/UX and beyond.


Youtube video URL Link for how it works in dark mode:
link0
Youtube video URL Link for how it works in normal mode:
link0
// MARK: - Body
var body: some View {
    SpotlightSearch(
        isSearching:$isSearching,
        didChangeSearchText: { self.viewModel.searchText = $0 },
        didTapSearchItem: { self.viewModel.searchText = $0 }) {
            self.searchButton
    }
}To run the example project, clone the repo, and run pod install from the Example directory first.
It includes examples for UIKit as well as SwiftUI.
In 'QuickExample' directory, there are sample codes.
//
//  ContentView.swift
//  QuickExample
//
//  Created by Seoksoon Jang on 2019/12/05.
//  Copyright © 2019 Seoksoon Jang. All rights reserved.
//

import SwiftUI

/// Step1:  import `SpotlightSearch`!
import SpotlightSearch

struct ContentView: View {
    @State private var isSearching = false
    @ObservedObject var viewModel = TestViewModel()

    let conf = SpotlightConfiguration(placeHolder:.property(placeHolderFont: Font.system(size: 30,
                                                                                         weight: .light,
                                                                                         design: .rounded),
                                                            placeholderText: "Search Anything"),
                                      colors: .property(listItemTextColor: .blue,
                                                        searchTextColor: .white,
                                                        searchIconColor:.blue,
                                                        deleteIconColor:.blue,
                                                        dismissIconColor:.blue),
                                      icons: .property(
                                        searchIcon:Image(systemName: "magnifyingglass"),
                                        deleteIcon: Image(systemName: "xmark.circle.fill"),
                                        dismissIcon:Image(systemName: "x.circle")
        )
    )

    // MARK: - Body
    var body: some View {
        /// Step2:  Declare `SpotlightSearch` externally.
        SpotlightSearch(
            isSearching:$isSearching,
            didChangeSearchText: { self.viewModel.searchText = $0 },
            didTapSearchItem: { self.viewModel.searchText = $0 }) {
                /// Step3:  your UI goes here.
                self.searchButton
        }
    }

    var searchButton: some View {
        Button(action: {
            withAnimation(.easeIn(duration: 0.3)) {
                self.isSearching.toggle()
            }
        }) {
            ZStack {
                Image(systemName: "magnifyingglass")
                    .resizable()
                    .scaledToFit()
                    .frame(width: 80.0, height: 80.0)
                    .foregroundColor(.blue)
            }
        }
    }
}

class TestViewModel: ObservableObject {
    @Published var searchText: String = ""
    @Published var searchableItems: [String] = ["Objective-C",
                                                "Clojure",
                                                "Swift",
                                                "Javascript",
                                                "Python",
                                                "Haskell",
                                                "Scala",
                                                "Rust",
                                                "C",
                                                "C++",
                                                "Dart",
                                                "C#",
                                                "F#",
                                                "LISP",
                                                "Golang",
                                                "Kotlin",
                                                "Java",
                                                "Assembly",
                                                "안녕하세요",
                                                "감사합니다",
                                                "사랑합니다",
                                                "행복하세요"]
}
In SwiftExample directory, there are sample codes.
//
//  ItemList.swift
//  Spotlight
//
//  Created by boraseoksoon on 11/18/2019.
//  Copyright (c) 2019 boraseoksoon. All rights reserved.
//

import SwiftUI

/// Step1:  import `Spotlight`
import SpotlightSearch

struct ItemListView: View {
    @Environment(\.colorScheme) var colorScheme: ColorScheme

    @ObservedObject var viewModel: ItemListViewModel
    @State private var isSearching = false
    @State var showingDetail = false

    // MARK: - Initializers
    init(viewModel: ItemListViewModel = ItemListViewModel()) {
        /// This is example view-mdel implemented for demo purpose.
        self.viewModel = viewModel
    }

    // MARK: - Body
    var body: some View {
        /// Step2:  Declare `Spotlight` externally.
        SpotlightSearch(
            /** searchKeywords is optional.
                if searchKeywords parameter is ignored, google suggestion is used inside automatically.
            */
            searchKeywords:viewModel.searchableItems,
            isSearching:$isSearching,
            /**
                if configuration parameter is ignored, default config is used
             */
            // configuration: conf,
            didChangeSearchText: { self.viewModel.searchText = $0 },
            didTapSearchItem: { self.viewModel.searchText = $0 }) {
                /// Step3:  Let's wrap SwiftUI Views in it using trailing closure.
                self.navigationView
        }
    }
}

// MARK: - Views
extension ItemListView {
    var navigationView: some View {
        NavigationView {
            listView
                .navigationBarTitle("Spotlight")
                .navigationBarItems(trailing:
                    Button(action: {
                        //
                        print("search click!")

                        self.isSearching.toggle()

                    }) {
                        Image(systemName: "magnifyingglass")
                    }
                )
        }
        .alert(isPresented: $viewModel.showingAlert) {
            Alert(title: Text(viewModel.errorMessage))
        }
    }

    var listView: some View {
        List(self.viewModel.searchedItems, id: \.id) { item in
            NavigationLink(destination: DetailView(item: item)) {
                ItemRow(item: item)
            }
        }
        .navigationBarTitle(Text("Photos"))
    }
}
Currently, SpotlightSearch uses GLOBAL API to change UITableViewCell and UITableView property GLOBALLY like below since SwiftUI is in the very early stage of development and there are plenty of lack APIs out there and not possible to implement such UI Change while using SwiftUI 100%.
Take special care when applying SpotlightSearch into your app which might cause unexpected UI/UX change in your app. I will keep my eyes on the SwiftUI API change and when possible, I will fix this workaround as soon as released.
Note that SpotlightSearch uses these implementation in the initializer as below at the latest version.
// MARK: - Initializers
public init(searchKeywords: [String],
     isSearching: Binding<Bool>,
     didChangeSearchText: @escaping (String) -> Void,
     didTapSearchItem: @escaping (String) -> Void,
     wrappingClosure: @escaping () -> Content) {

    /// FIXME: THOSE GLOBAL THINGS MAY BE APPLIED TO ALL APP ALTHOUGH MODULE IS SEPARATED.
    /// BUT, THERE IS NO SUCH THING AS API BY WHICH I CAN MODIFY SWIFTUI.
    UITableView.appearance().allowsSelection = false
    UITableView.appearance().separatorStyle = .none
    UITableView.appearance().backgroundColor = .clear
    UITableView.appearance().tableFooterView = UIView()
    UITableView.appearance().contentInset = UIEdgeInsets(top:0,
                                                         left: 0,
                                                         bottom: 300,
                                                         right: 0)

    UITableViewCell.appearance().selectionStyle = .none
    UITableViewCell.appearance().backgroundColor = .clear

    self.content = wrappingClosure
    self._isSearching = isSearching

    self.didTapSearchItem = didTapSearchItem
    self.didChangeSearchText = didChangeSearchText

    self.spotlightSearchVM = SpotlightSearchVM(searchKeywords: searchKeywords,
                                               didChangeSearchText: didChangeSearchText)
}There are two ways officially to use SpotlightSearch in your project:
CocoaPods is a dependency manager for Objective-C, which automates and simplifies the process of using 3rd-party libraries in your projects. See the Get Started section for more details.
First,
pod 'SpotlightSearch'then in your root project,
pod installSwift Package Manager (SwiftPM) is a tool for managing the distribution of Swift code as well as C-family dependency. From Xcode 11, SwiftPM got natively integrated with Xcode.
SpotlightSearch support SwiftPM from version 5.1.0. To use SwiftPM, you should use Xcode 11 to open your project. Click File -> Swift Packages -> Add Package Dependency, enter SpotlightSearch repo's URL. Or you can login Xcode with your GitHub account and just type SpotlightSearch to search.
After select the package, you can choose the dependency type (tagged version, branch or commit). Then Xcode will setup all the stuff for you.
If you're a framework author and use SpotlightSearch as a dependency, update your Package.swift file:
let package = Package(
    dependencies: [
        .package(url: "https://github.com/boraseoksoon/SpotlightSearch", from: "0.1.1")
    ],
    // ...
)boraseoksoon@gmail.com
SpotlightSearch is available under the MIT license. See the LICENSE file for more info.
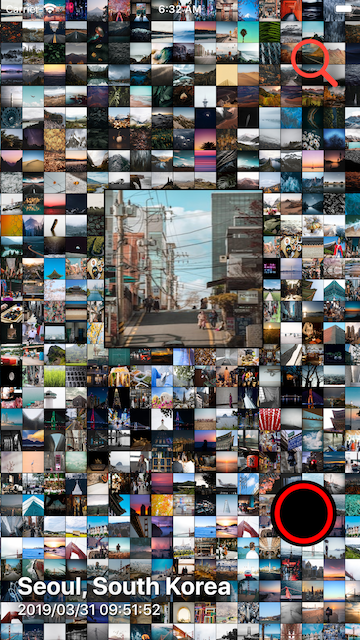
PhotoCell : Time and Location-based photo browsing iOS app where you can download the photos and edit as you like for free.


